Installing Rails on Windows (step-by-step tutorial)
Ok, so this will basically be somewhat a repeat of the information made by Curt Hibbs in this great hands-on tutorial. However, the versions of all products changed from the time Curt made his tutorial, and in some areas I felt that additional description was required. So, in this tutorial you’ll get a step-by-step instructions on installing Rails on Windows 2000 Server (Windows XP would be very similar).
In order to have a fully working development environment, you can use your PC. You will need to install:
- Ruby - the language
- Ruby Gems - the plug-in manager for Ruby
- Scite or FreeRIDE - IDE for Ruby
- MySQL - the database
- MySQL query builder / MySQL admin tools - GUI to create databases, add users and create tables
- Rails Framework
I. Installing Ruby
This is easy. Just get the latest One-click Installer for Windows (currently 1.8.2-15). Installation is simple, and indeed one-click. Once the installation is complete, check that path to ruby\bin directory is in your PATH variable (Run “cmd”, then type “path” at the prompt and check that the path is there.
The great thing about the one-click installer is that it comes with Ruby Gems, Scite and FreeRIDE preinstalled. The thing to watch out for is that one-click installer does not have the very latest version of Ruby, so when you are reading Ruby Docs, make sure you know which version of Ruby you have (run “ruby -v” in the command prompt).
II. Installing MySQL
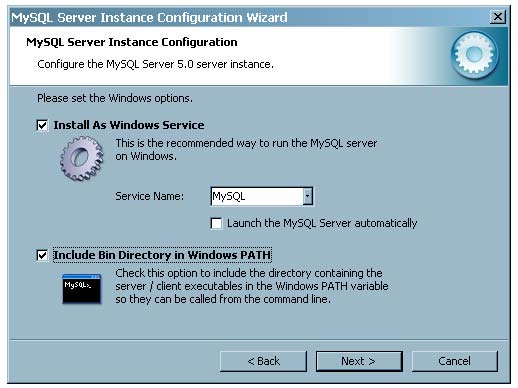
This might be more tricky, depending on your home computer’s set up. First, download and run the latest Windows Essentials (x86) version of MySQL (currently 5.0.18). After the files are unzipped, an Instance Config should run automatically (you can run it manually at any time from your MySQL bin directory just run “MySQLInstanceConfig.exe”).
Below are the options to use for the Instance Configuration.
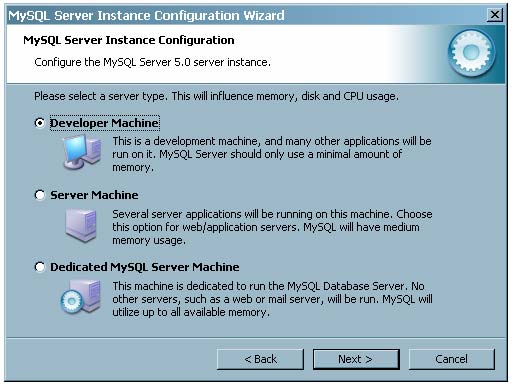
1. Select “Detailed Configuration”

2. Choose “Developer Machine”
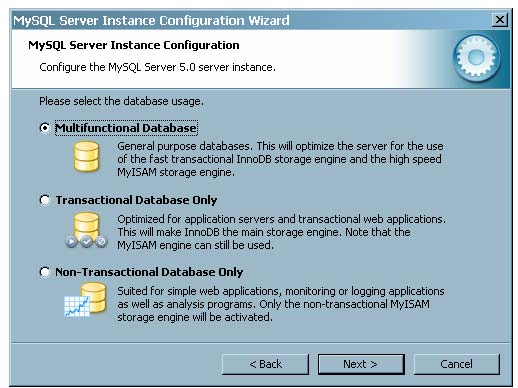
3. Choose “Multifunctional Database”
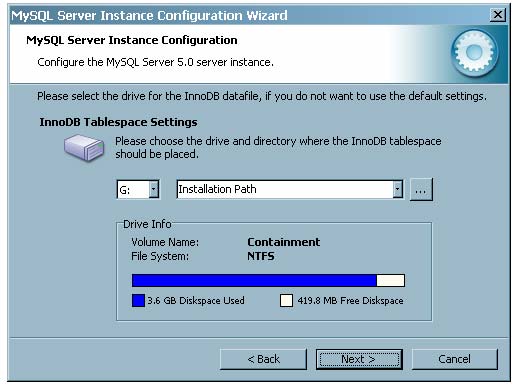
4. Leave the next screen unchanged
5. Choose “Decision Support / OLAP”

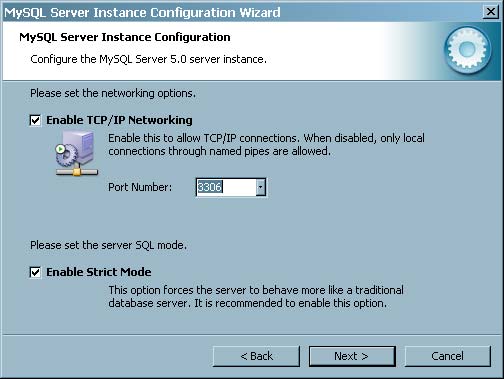
6. From the security perspective it is better to have “Enable TCP/IP Networking” unchecked, however I wasn’t able to make MySQL work with Rails in that case. So, choose “Enable TCP/IP Networking” for now and leave “Strict mode” checked.
7. Choose “Best Support for Multilingualism” (MySQL will use Unicode for stored data).

8. Have both options checked.
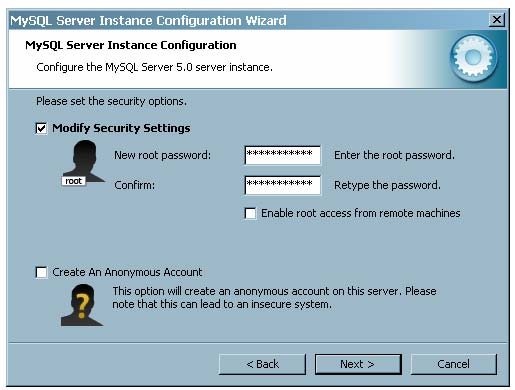
9. Now, create a password for root account. Make sure that you do not use an easily guessable password and do NOT leave these fields blank (ie, do not use blank password for root). Also, leave the “Enable root access from remote machines” unchecked.
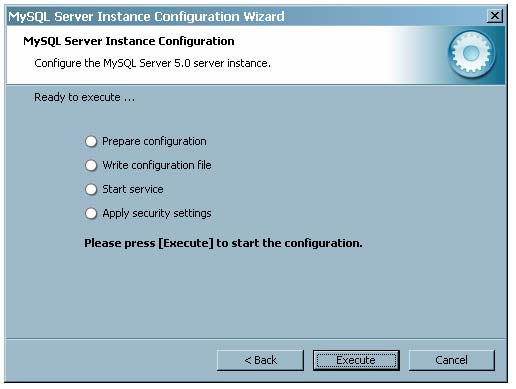
10. Click “Execute”. If everything went ok, you should have green tick marks for all installation steps.
11. Now, you need to do some basic security tweaking, to make sure nobody hacks your database from the outside. Go to the MySQL directory (c:\mysql by default), open my.ini and add the following line to the [mysqld] section of your server configuration file:
bind-address=127.0.0.1
This line will make sure that only services from your localhost will be able to access database (so, this means you and your web server).
Now, you need to restart MySQL. Go to Services (In Windows 2000: Start -> Programs -> Accessories -> Administrative tools -> Services), find “MySQL”, highlight it, click “Stop” and then “Start” icon.
12. Quickly try if your mysql set up is working, by running this command in the prompt:
mysql.exe -h 127.0.0.1 -u root -p
You will be asked to type your password and if everything is fine, should be presented with the message “Welcome to the MySQL Monitor” and the mysql prompt. It works! You are almost there.
If it does not work - first, make sure that you are entering the password right (check Caps Lock and Language Indicator). Check that MySQL service is running (see step 11). Another usual suspect is your local Firewall (your router firewall will not interfere with the local MySQL installation). A quick fix would be to allow communication for ruby.exe and mysqld-nt.exe on all ports (check your Firewall manual or help).
III. Installing Rails
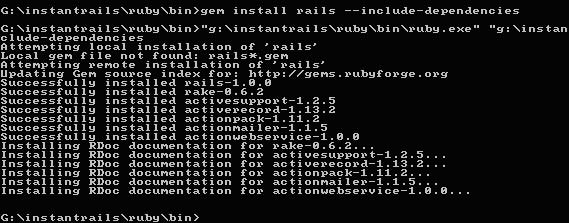
1. Go into the ruby bin directory and run this command from the command prompt:
gem install rails --include-dependencies
(If this command gives you an error, you do not have the latest version of gems installed. Run “gem -v”, it should be 0.8.10. If it’s an earlier version, I recommend to reinstall the newest package - see beginning of the tutorial).
This command will install rails 1.0 and RDoc documentation for it. It should take up to 5-10 minutes, so do not worry when for a couple of minutes you just see a message “Updating Gem source index for: http://gems.rubyforge.org/” - there is no progress bar or any other indication of activity, but it is doing the work.
At the end you should see something like this:
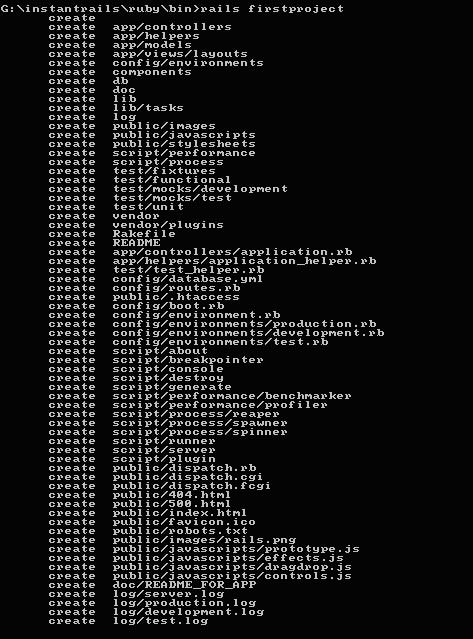
2. After that, create a directory for all of your projects. I just have one in the ruby directory. Go into this directory by using the “cd c:\ruby/myprojectsdir” and run
rails firstproject
You should see something similar:
3. Finally, “cd firstproject” and run
ruby script/server
This will run the file “server” (no extension) in the script subdirectory of “firstproject directory”, which will in turn run the Rails built-in web server WEBrick. Test the web server by opening the following address in your browser:
You should see the following pic:
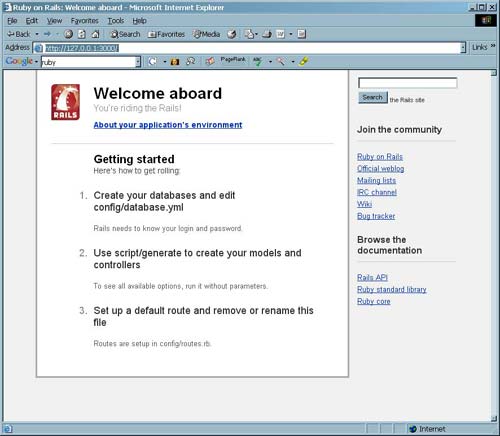
One of the drawbacks of having a Ruby-based web server is that WEBrick needs to run in its separate command prompt window, so you should be careful not to close the window down incidentally, or you will need to restart the web server.
Congratulations! YOU ARE ALMOST DONE!
IV. MySQL Admin
Here, you have several options, however the tool I love the most - MySQL Control Center - is no longer in development. You can still download it here (v.0.9.2) or here (v.0.9.4). Or you can download MySQL AdministratorQuery Browser from MySQL.com. I haven’t tried those tools yet, so I will show how to work with MySQL CC, but the steps will be very similar. and
Note on MySQL CC and MySQL Administrator / Query Browser:
MySQL CC is not fully compatible with MySQL 5.x, so it might be better to use Administrator and Query Browser. However, MySQL CC is a very easy to use bare-bones program and it allows to do everything you need in this tutorial. If you opt for Administrator / Query Browser set-up, you would use the Administrator only for creating database users (and in future for setting up security, back-ups and restarting MySQL). For all other things you will use the Query Browser (in the Query Browser databases are called “Schemas”, and when you first run QB, you can safely ignore the warning to supply the schema name).
1. Install MySQL Admin and run it.
2. Create a new database connection by clicking the icon shown (or press Ctrl-N):

3. Fill out the information as shown in the picture below:
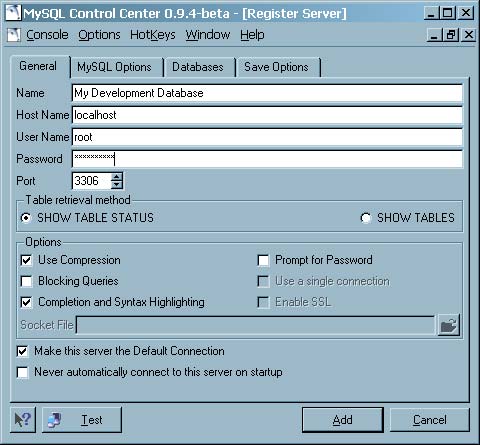
Name: This is any name you want - for GUI purposes only. Call it “My Development Database”.
Host name: This would be either “localhost” or “127.0.0.1″. On some weird configs “localhost” might not work, so try to use either one.
User name: “root”. Leave it as is.
Password: your root password. Remember setting it when installing MySQL? ![]()
Make this server the default connection: If you do not have any other databases, tick this box. By running MySQL CC next time, you will automatically connect to the database.
Now, click the “Test” icon, and if successful, click “Add”.
4. Create the database.
Go to the main console. It now should have your database “My Development Database”. Check that it is connected, if not click the “Connect” icon.
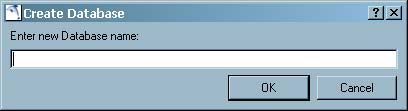
Right click on the “Databases” folder and select “New database”. You will be presented with the following prompt. Just name the database “firstproject”, although it does not really matter how you call the database.
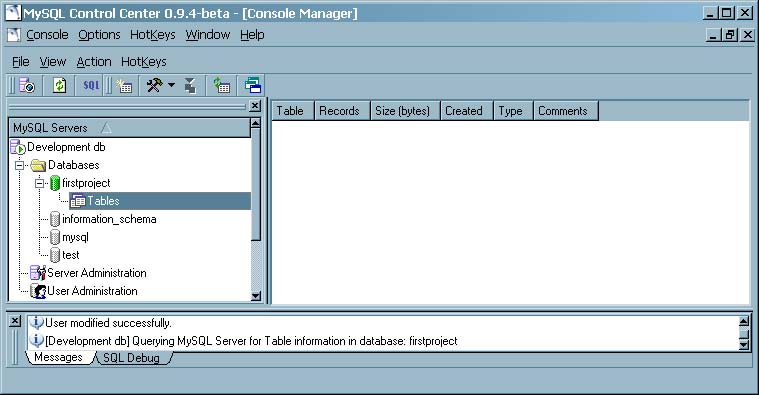
5. Now, back to the main console window, you should see the database name “firstproject” in the list of databases for your server. Double click on the database and then click on the “Tables” subfolder. It should look something like this:
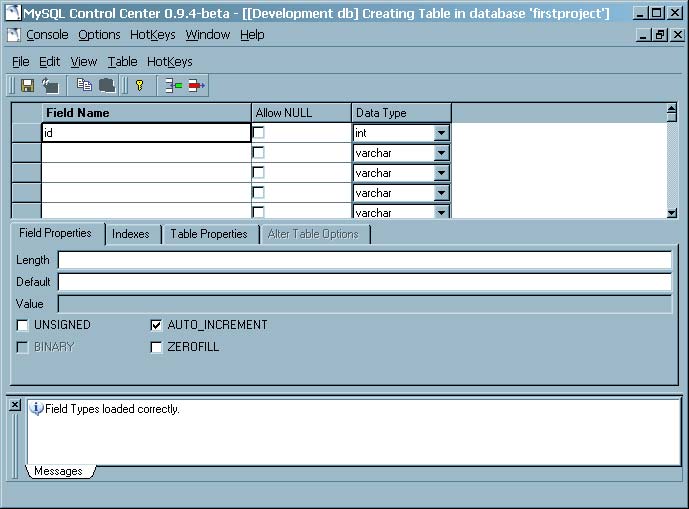
6. Now, the database for your project has been created, you need to create a test table. Right click the “Tables” folder and choose “New table”. Let’s make two fields: id (type: int) and title (type: varchar).
“id” field is required by Rails and is the usual feature for the majority of tables. You do not usually insert the “id” directly, so we need to make sure that “id” is never empty (not null) and is automatically incremented (0,1,2,3,…). Also, make sure that the “id” is written in lowercase, for Rails to understand that this is your unique id field.
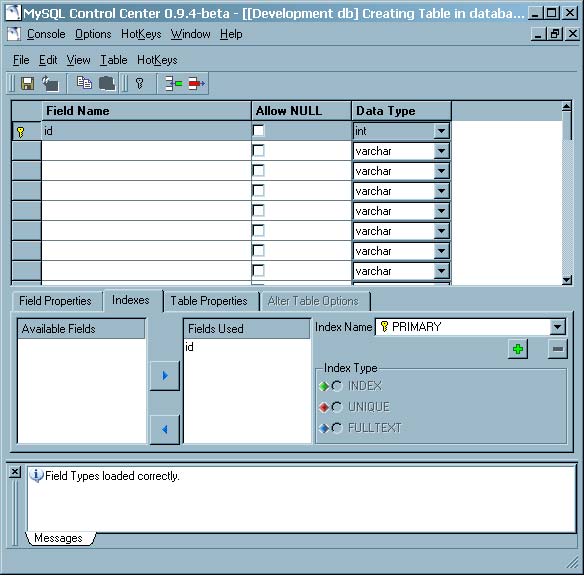
Now, let’s define “id” as our primary field. Go into the “indexes” tab, select “id” field and press the right arrow, it should end up looking something like this:
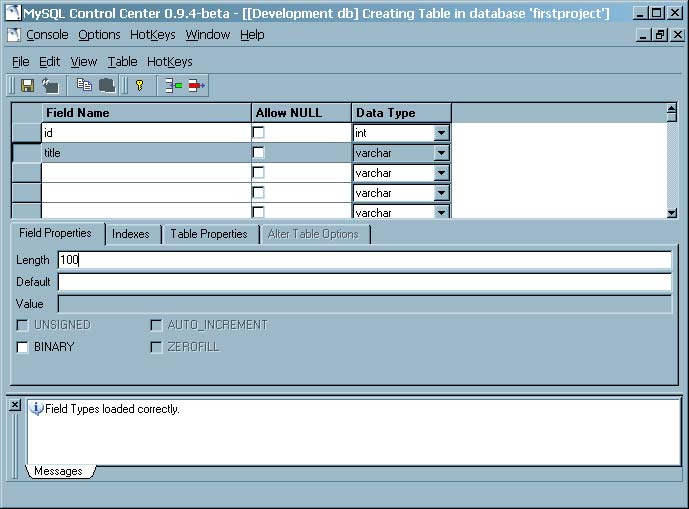
Now, add the “title” and choose the type “varchar”, like this (length of 100 symbols should be enough for your title, but when you will be adding a field for url you would want to change it to 255):
Finally, click the “Save” icon and you will be asked to name your table. Rails has a special notation for naming tables - basically they have to be in plurals, as they will hold instances of particular class (objects).
Let’s call the table “Stories” (Rails is supposed to know the plural form for “Story”, so let’s try it out). Go back to the main console window and double click the “Tables” subfolder. On the right you will see the list of tables (we have only one at the moment - called “Stories”). Double click the table, it should return an empty set, as you do not have any records yet. (Do not try to create a record - MySQL CC will not correctly do this in MySQL 5.x).
7. Finally, it would be wrong to run your project using a root password. So, you need to create the database user especially for your project. It is very easy to do. In the main console right-click on the “User Administration” folder and select “New User”. Fill out the form as shown:
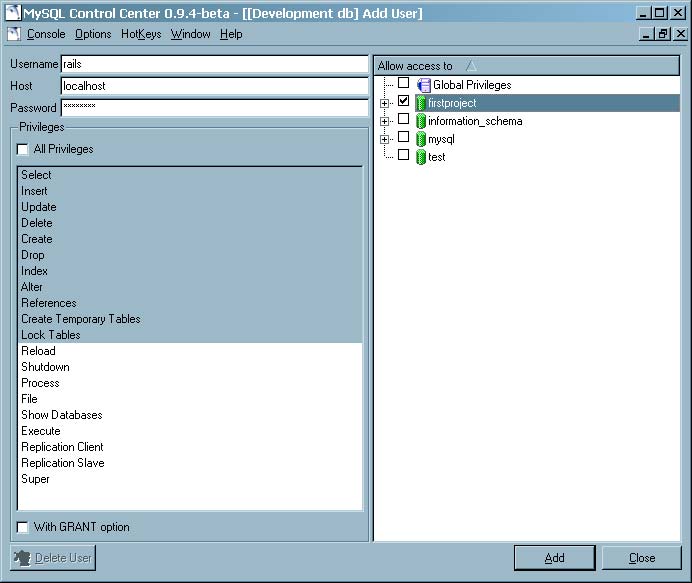
Username: rails (this would be the username exclusively used for your project)
Host: localhost
Password: password you will use to access this user account
Priviliges: You should provide the least possible priviliges for the user. The ones selected by default are ok, but you can actually safely leave priviliges to only “Select, Insert, Update and Delete”, as we do not plan to create, drop (delete) or alter (change structure of) tables from our Rails scripts. Finally, select, to which databases you are allowing access. Select ONLY the “firstproject” database and click “Add”.
V. Rails in action
1. Now that the database model was prepared, we need to switch it on for our project. Go into your rails project subdirectory (you remember where you created it, right?). In the “config” subfolder you will find file database.yml. Open it and find the “development” section. In it, change database name to “firstproject”, username to “rails”, password to rails user password. Leave socket unchanged. Here is how it will look like:
development:
adapter: mysql
database: firstproject
username: rails
password: railspass55
socket: /path/to/your/mysql.sock
In order for those changes to work, you will need to restart the WEBrick server. Close the WEBrick window and run the server command again:
ruby script/server
2. You have the database schema defined and you configured Rails to access your database. Now, what we need is to create the class called “Story”. The easiest way to go is to create a scaffold, which is basically a default script to work with the standard database operations under the acronym of CRUD (Create Read Update Delete or in SQL terms: INSERT, SELECT, UPDATE and DELETE). To do this, again go to your script’s directory and run this command:
ruby script\generate scaffold Story
Make sure that you use the capital “S” - this is actually a Ruby rule that you need to follow - class names need to be capitalized. So, this is where the magic happens - you do not need to define the class in Ruby the “hard-way”. You define the class variables (so-called states) only once - in the database, and then those variables are automatically recognized by Rails and a standard CRUD framework is applied, which you can replace with your own code as you go.
3. Finally, check that everything works by going to this link: http://127.0.0.1:3000/stories/
For fun, try creating, updating and deleting records and see how the table records are automatically updated in the MySQL CC or Query Browser.
IN CONCLUSION
Installing Ruby on Rails is not a difficult process, but it takes some time. However, once installed you will not only feel comfortable with basic MySQL administration, but will also get a development environment which is much faster and easier to use than a hosting based alternative. Once you create a web service that can be released to public, you can easily move it to one of the Rails hosting providers.

No comments:
Post a Comment